

If you’re new around here, a year and a half ago my husband and I purchased our first house: a 1940’s Colonial located in a very cute coastal Connecticut town. We’ve been tackling remodeling the house room by room, where we’re always looking for ways to add equal parts function and character into our house. Catch up on Week One, Week Two, Week Three, Week Four. and Week Five.
I couldn’t be more excited to share the final reveal of our One Room Challenge™ Master Bathroom. Over the past five weeks, my husband, Cory, and I have been building our bathroom from the studs up. Just a few weeks ago, this room was without walls, a ceiling, or a subfloor, so we’ve come a very long way. We did all the work ourselves (except plumbing), so this was definitely a labour of love. Where we spent the past five weeks insulating walls, hanging drywall, installing tile and so much more. This was by far the most ambitious project we’ve ever taken on and we’re so proud of the final result, I hope you like it!
BEFORE
Previous to the One Room Challenge starting, we had gutted our former ‘master’ bathroom, it featured a cramped layout, single vanity and a complete lack of heating (we live in Connecticut, so winters were rough in this bathroom).


And here’s where we started the One Room Challenge, where we stole square footage from our closet, pulled the walls inward by a few inches to accommodate a better future walk in closet layout, and had our plumbers reconfigure the placement of all the fixtures.


THE REVEAL
The vision for this bathroom was a luxe, vintage European boutique hotel bathroom with some modern elements mixed in. I wanted this bathroom to feel like the older, worldly sibling to our last One Room Challenge project, the Guest Bathroom. We used similar materials like marble counters and floors, brass fixtures, hints of black and lots of white, but added some elements that were unique to this space, like that pop of blue. I couldn’t be more thrilled and proud of how this bathroom turned out. Let’s dig into the details.


The Floors
Before we even closed on this house, a year and a half ago, I knew I wanted marble herringbone floors in my bathroom. Herringbone is one of my all-time favourite patterns – it’s classic, clean, but still fresh. Not only are these floors beautiful, but they feature radiant heating, so I’m looking forward to toasty feet this coming winter (but let’s be honest, we’ll probably use it year-round). I’m even more proud that I taught myself how to use a tile saw in order to cut all the edge pieces.


The Trimwork
We paired with Metrie on the trimwork in this room and it really elevates the space. We installed Metrie casings on the window and door first, which helped both openings stand out, instead of recede into the room. We then installed chunky baseboards that bring a lot of presence to the room. We opted not to add quarter round to keep the aesthetic clean in this narrow space. We then installed the recessed panel moulding on the walls which truly made the room. If you’ve been following my progress of upgrading my home, you probably know that my love of wall moulding runs deep and I’ve been adding it to many of my spaces. Especially in a long room like this one that has a lot of open wall space, I wanted to bring some extra attention to the walls. One of the other reasons we opted for recessed moulding was to bring the walls flush with the shower tile so we could install crown moulding throughout the room, tying together the shower to the rest of the bathroom.

We painted the walls Benjamin Moore Decorator’s White with a spray gun, for a very clean finish. The sheen is satin, which brings both durability to the walls and some extra shine and dimension to the trimwork.


The Shower


One of the things I was most excited about in this space was continuing the wall moulding detail into the shower with marble pencil tile. To contrast the medium scale of the herringbone tile, I opted for large format 12×24 marble tile on the walls. We then inlaid the marble pencil tile within the tile. This was an insane amount of work. In retrospect, choosing a pattern that took us 40+ hours to complete when you’re working on a tight timeline probably wasn’t the smartest idea, but OMG that tile. I love it so much. It’s these custom details that make DIY worth it to us, knowing that we put our own spin on the space with details I’ve scarcely seen in the wild.

Cory wrapped the tile around the shower curb using a beveled edge, so it gives the appearance of being a single piece of marble. We love thinking through these sorts of details.
In addition to the tile detail, another component of the shower that I was really excited about was the floating shower bench. We didn’t find a lot of information on the interwebs for installing a floating marble bench, so I’ll be doing a how-to post at a later date. We had our marble shop fabricate this bench and it’s gorgeous.


For shower fixtures, we used the same Restoration Hardware series in Aged Brass as in our Guest Bathroom, where we opted for both a rain shower head (at my husband’s request) and an adjustable wall-mounted shower head (because 1. I don’t always want to get my hair wet and 2. The hose will help us with cleaning the shower). We installed the controls on the right wall so we can reach in to turn on the shower and let it warm up without needing to get wet.


Finally, we splurged on the shower door and couldn’t be more thrilled. We debated going with a ready-made option (or just a single panel) but at the end of the day, we knew this was a detail than can easily bring down the luxe feel in the space if it wasn’t quite right.


The Vanity
After a lot of vanity drama (that I detailed in last week’s post), we ended up buying a custom vanity used off Craigslist and refinishing it. I filled in the holes from the original hardware, filled in the indentations with wood putty and used a spray gun to paint the piece for a very professional looking finish. I’m actually not a huge lover of color, but my husband requested it and so, I sourced a blue for the vanity. I wanted to keep the color light, so the room could feel airy, but not too light that the vanity faded. I tested four different blues from Farrow and Ball, but Stone Blue was the clear winner. It actually reads a bit darker and warmer in person. It’s an absolutely stunning colour that we can’t get enough of.

I upgraded to gorgeous hardware from Rejuvenation. I love the vintage charm of the knobs and the slim proportions of the pulls. The unlacquered brass looks so great against the Stone Blue. You can’t even tell that it’s the same vanity.
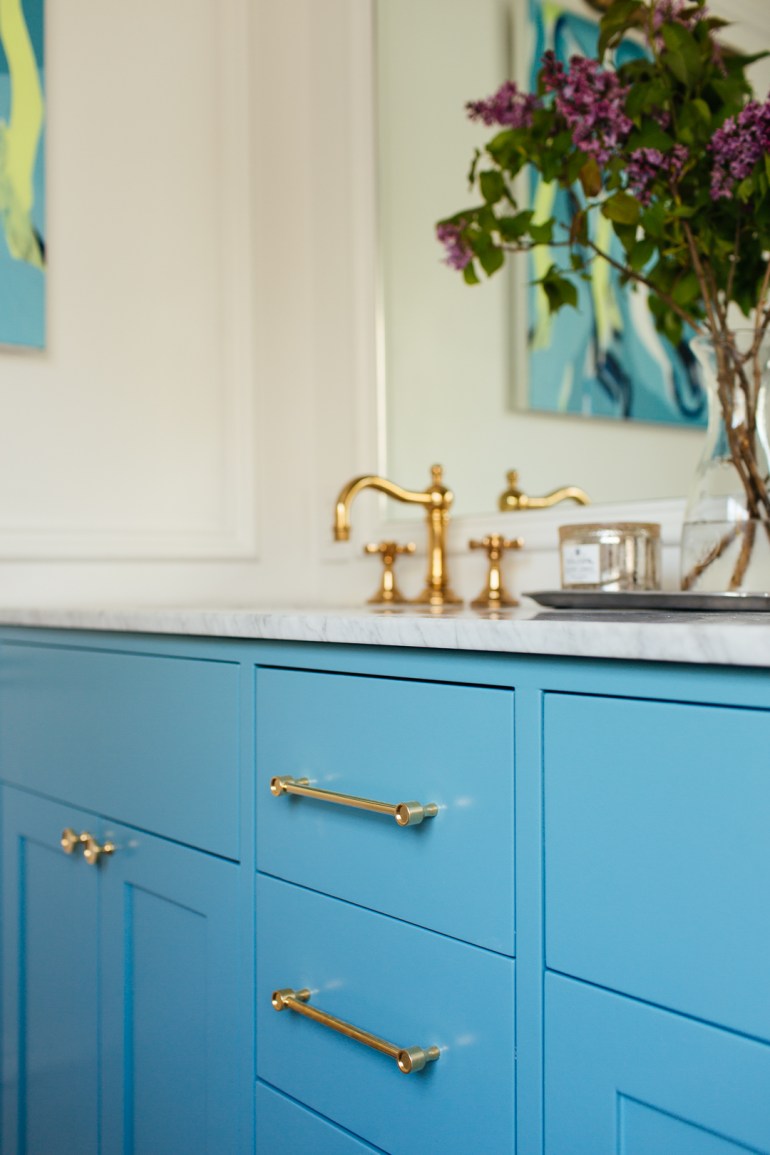


The vanity came with this marble countertop, but was only drilled for a single hole faucet, so Cory created a template in a long piece of wood and we used a diamond bit to cut the holes for the widespread faucets. We were totally intimidated by this project and had planned to contract it out to our marble guy, but upon him telling us this wasn’t something he does, we resigned to do it ourselves. It was way simpler and less scary than we had expected.


Now, onto the faucets. These were actually one of the first things we purchased for the space. Upon coming across them at the Restoration Hardware Outlet, Cory fell hard for the chunky proportions, so we went for it. I love that they have their own personality and bring some bling to the room.

Art

Given the layout of this space, I was so excited to include a dedicated art moment framed by the wall trim and a gallery lamp. One of my absolute favourite pieces in this room is this insane painting by Thomas Hammer. Using just the vanity color, Thomas knocked it out of the park. When he sent me the photo of the finished painting last week, my jaw dropped in awe. I’m obsessed with the texture and movement in this piece and the unexpected strokes of lemon-lime green. It’s dynamic, fresh and inspiring. If you want further inspiration, I’d recommend checking out his other work, the palettes are so unexpected and have already inspired my next room.
Lighting and Mirror
Sourcing a mirror for this vanity was a massive challenge. For weeks I looked at measurements on mirrors and couldn’t find a single one that was both tall and narrow enough to sit over each sink without hitting the moulding. I finally arrived at the perfect solution: a custom-cut mirror, and frankly, it was the best solution I could have come up with for this space. Mounting the sconce directly on the mirror allows for the best of all worlds: a massive mirror that highlights the trimwork and allows for a very cool sconce. Oh, and it was shockingly inexpensive to have made. We’re in love.


This sconce was the result of our original sconce being backordered, and I’m not upset at all about it. This sconce is large enough to not be engulfed by the massive mirror, brings a lot of light to the space, unifies our mix of brass and black finishes. We also really love that it’s up and out of the way.


The flushmounts on the ceiling were a happy accident. I intended to pick up the larger size but accidentally ordered these smaller ones. We debated for days whether they were too small, but once we had them up, they’re actually pretty proportional and don’t compete with the rain shower head.
The Toilet


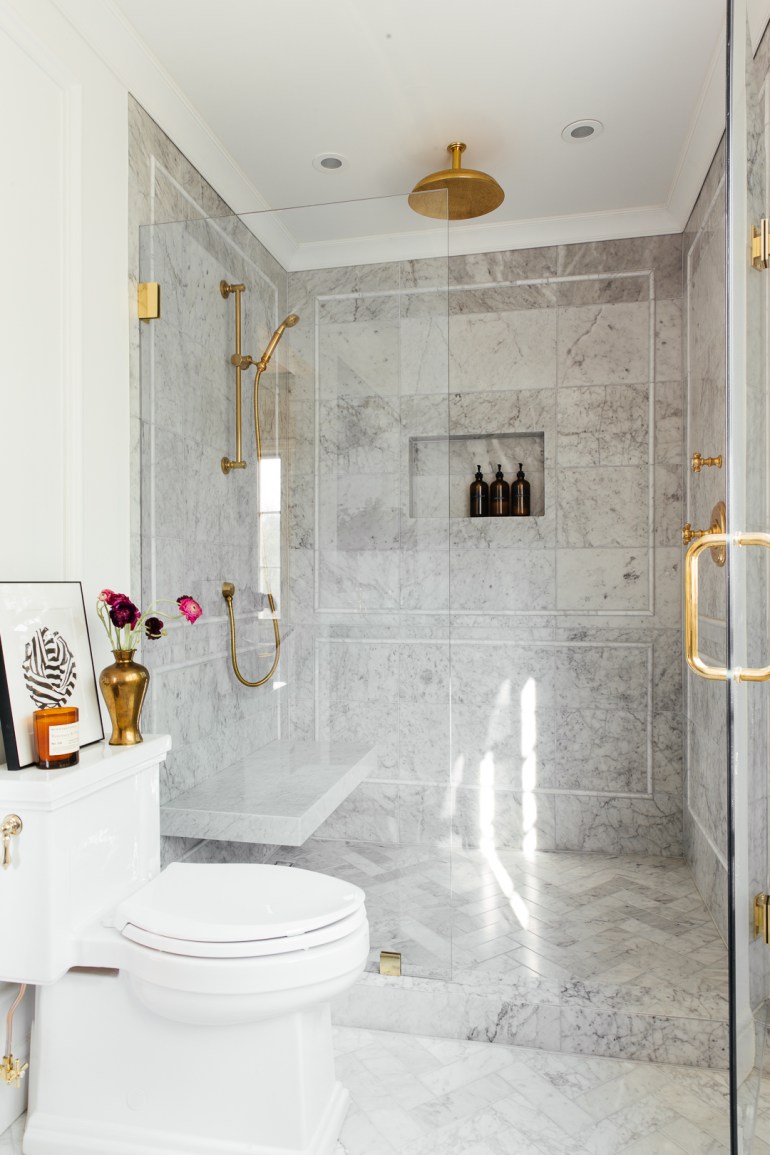
This toilet caused more drama than I ever would have expected. After ordering the same toilet as in our guest bathroom, we discovered that there was a joist running through the exact spot where the toilet flange needed to go. So, we returned that one and set off on finding a toilet with a less standard 14” rough-in. This also gave me the opportunity to source a skirted toilet. Since the side is so visible to the room, a skirted style helps to keep it looking elevated (or as elevated as a toilet can get). We ended up with this Kohler option and love its elegant lines.


Rug
This rug is a vintage Persian Lilihan and is absolutely stunning. The colors are so vivid and beautiful, and I love that it picks up the blue in the vanity without being overly matching. Joanna at Upstate Rugs provided it for the room and she was awesome to work with – it was so hard to choose from her great collection.


Accessories
We added a glass towel bar and while I tried three different towels, I inevitably landed on our trusty monogrammed ones that have made it into pretty much every one of our bathrooms. Don’t worry, I’ve already ordered some more with different embroidery because they are clearly my favourite.
On the vanity, I accessorized with a vintage silver tray from Goodwill, some gorgeous lilacs, an Anthropologie candle and some divine smelling hand soap. I love keeping it simple with accessories and varying the heights and sizes as much as possible. A tray is always the way to go for creating a contained vignette.
One the toilet, I used my favourite print from Angela Chrusciaki Blehm . The candle and ranunculus rounded out the vignette.
In the shower niche, I brought in our shampoo, conditioner and body wash which I’d decanted into these bottles and labeled with this label maker. It’s a simple and inexpensive solution for mismatched toiletry bottles.

Sources
Wall Paint: Benjamin Moore Decorator’s White
Vanity Paint: Farrow and Ball Stone Blue
Marble Floor Tile | Marble Wall Tile | Marble Pencil Tile
Toilet | Faucets | Adjustable Shower Head | Rain Shower Head | Shower Valve| Shower Diverter
Baseboards | Crown Moulding | Stiles | Casing | Fingerjoint Applied Trim
Candle | Hand Towels |Towel Bar
You can check out all the other participants on the official One Room Challenge™ site here.

