Medicine cabinets in a frequently used bathroom can be an amazingly functional addition for storage; however, they can be very tricky to find. My go-to used to be the inset polished nickel medicine cabinet from Restoration Hardware, but in recent years they have sadly discontinued this collection. So, here are 10 sources for medicine cabinets that may serve as alternatives for you in your own bathroom renos. Update: Restoration Hardware re-launched their medicine cabinet collection in August 2023, including this classic Framed Inset Medicine Cabinet, in addition to a few other styles.
Tag: Bathroom
How to tile like a professional
Tiling is one of my favourite DIY projects because you get the instant gratification of getting to step back and see a formerly blank wall come to life. It’s been over five years since our first tiling project and we have learned a lot in those years. More recently, we completed an epic bathroom tiling project with Fireclay tile in which we put all the below tips to use. After every project, we assess what we could have done better, so that the next time our results and process are even more fine tuned. So that you can skip over learning those lessons first-hand and be a more professional tiler, everything we’ve learned is below.

Our new satin brass bathroom faucets
A few years ago, we completely renovated our primary bath and have absolutely loved how this space works for us. However, in time, our faucet finish started to wear, I believe due to hard water (which we’re addressing!). So, when DXV approached me about updating a space with their luxe plumbing fixtures, it was the perfect opportunity to update the faucets for some beautiful, well-made ones that will stand the test of time.

*This post is sponsored by DXV Luxury. All content, ideas, and words are my own. Thank you for supporting the brands that allow us to create helpful content while featuring products we use and love!
Affordable Ceramic Tile (That look expensive!)
For a recent bathroom project, we discovered that the very affordable denim blue ceramic tile we had picked out for the walls was no longer available due to the factory having recently closed in Spain. This set me off on the hunt for replacement tile that was on budget, available immediately, and hand-glazed. I crowd-sourced some great options from my audience and compiled in hopes it helps others. For reference, I deem affordable as being $10/square foot or less. Yes, you can get plain white subway tile for less than that at Home Depot, but I’m looking for one step up from that, where the tile looks handmade and has colour options, and preferably in a long skinny brick size, my preference for ceramic tile.
One other note, I love high-end ceramic tile and have many times before worked with Fireclay tile, when the budget allows and it is 100% worth the added expense. That being said, not all projects have the budget for high-end tile, hence the below list!

Continue reading ➞ Affordable Ceramic Tile (That look expensive!)
Wallpaper and tile combinations that pair beautifully for a bathroom
One of the defining features of our most recent bathroom renovation is the combination of beautiful handmade coloured ceramic tile from Fireclay paired with a complimentary wallpaper. It’s a timeless combination that brings a lot of drama and interest to a space, and also feels incredibly elevated. I dove into my assortment of Fireclay samples and paired them with wallpapers I think would look gorgeous in a bathroom, to inspire you to create the same look in your own home.

Continue reading ➞ Wallpaper and tile combinations that pair beautifully for a bathroom
Designing the perfect shower: 7 things to consider
We’re knee deep in planning out our second shower renovation and I wanted to share some of the things we’ve learned along the way, as long as some crowd-sourced features that you shared with me on Instagram last week. As with many home spaces, showers need to strike that perfect balance between incredibly functional to use and aesthetically beautiful.

Continue reading ➞ Designing the perfect shower: 7 things to consider
20 lessons from renovating two bathrooms in six months
Over the course of six months, we managed to tackle two complete bathroom remodels from the studs up, and I wanted to share some of our biggest learnings, since these were our first two bathroom renos ever and we learned a lot. These lessons apply if you’re tackling the work yourself, or if you’re hiring it out.
You can check out our Master Bathroom and Guest Bathroom reveals.
Planning Stage
1. Take your time to rethink the layout. You may be able to unlock space and make your room more functional. It might be expensive, but it’s worth exploring the cost in case it fits in the budget.
2. Determine your must-haves for the space. Prioritize the things that matter to you: tubs, rain shower heads, steam showers, a double vanity, heated floors, etc. if you’re limited on space and/or budget (like us!) you’re going to have to identify what matters to you and what is less necessary. Everyone has an opinion on whether they think a master bathroom needs a tub, but space constraints are real and it may not be critical for you.
Continue reading ➞ 20 lessons from renovating two bathrooms in six months
A master bathroom update: the shower
It’s been a little while since I checked in on the master bathroom (past posts are here). While it looks like we haven’t made a lot of progress, we’ve actually made quite a few decisions these last few weeks.
We reworked the shower layout several times and finally landed on the final placement of every fixture. If you recall, our shower is at the end of the bathroom and has walls on three sides. Let’s get into it:
Here’s a rendering with totally different finishes, etc., but can help to envision the space (PS I used this free app)

1. A floating marble bench
We decided on a floating marble shower bench on the left wall underneath an adjustable hand held shower head (that black bench in the rendering is a stand-in). We picked out a remnant slab at a local marble company and it’s been fabricated to our specs. This wasn’t cheap by any means, but it also wasn’t as expensive as it could have been and I genuinely believe it will bring something special to our shower. This was nearly impossible to find a how to DIY online, so expect a blog post with instructions once we’ve made it to the other side.
This is the bench inspiration:

2. A rain shower head
The rain shower head is going dead center in the shower. It arrived last week and Cory called me down by saying “check out how pretty this is!”. Suffice to say I’ve rubbed off on him and we both are obsessed with good looking shower fixtures. The rain shower was his special request, and I’m not complaining. Don’t worry, there’s a standard shower head on the left wall so I don’t have to get my hair wet when I shower… priorities.
3. Shower niche
The niche will now be dead center on the wall directly in the middle shower. It’s going to be wide at 24”x16”, and I’m much happier with the symmetry of it being on this wall. It will be very visible in the bathroom, but that just means I get to splurge on good looking toiletries amirite? I know this might be controversial, but I don’t love the look of a contrasting niche, so this is just going to be a continuation of the same oversized marble tile.
4. Shower control
The shower control and diverter (which controls the flow to the rain shower) will be on the right wall. I wanted this to be accessible from outside the shower so you can adjust the temperature before jumping in. This control is on an outside wall, so there’s going to be a lot of insulation happening behind here.
5. Glass door
We haven’t quite decided on whether we’re going to do a glass door (that opens both ways) or just a glass panel to keep it light and airy. We’ll probably hold off on making the decision until we see the shower in action.
6. The great curb debate
We’re adding a curb to the shower. This is what I’m most disappointed about because a curbless shower feels so much more open to me, but I’ve admitted defeat. With a 5’ wide shower, we need a slope of 2” or so from right to left, which means we’d need to bump up the floors in the entire bathroom by that much, which would create an awkward transition from the closet and a lot of lost height in the room. Thus, I’ve agreed to adding a curb.
And we decided on a vanity that’s presently hanging out in our garage. We went with a ‘save’ option that got great reviews and looks surprisingly chic for the price and should look even better with new hardware. But if it isn’t quite up to my standards, I figured I could return it and source a higher end one.
Our plumbers are hopefully going to be starting later this week, so fingers crossed that our next update has some great progress photos!
In the meantime, this bathroom in the most recent issue of House Beautiful has me considering a wood vanity instead…

One Room Challenge: Guest Bathroom, The Reveal!
For those of you who are new here – I’ve been documenting the process of remodeling our 1940’s Colonial home in coastal Connecticut into a space that’s modern, fresh and layered but still maintains its traditional roots. You can check out past week updates here: week one, week two, week three, week four, week five and week six.
Welcome to the final week of the One Room Challenge™, where we’ve spent the past six weeks completely renovating our guest bathroom from 80’s basic to a modern take on the old-school European hotel bath. This bathroom pairs with our guest room, so keeping a consistent thread from room to room was critical. To be completely honest, I wasn’t sure we’d complete this project in time because we bit off A LOT with this one (thank goodness for that extra week!).
During the course of this challenge, my husband and I took our bathroom down to the studs, laid new level subfloor, installed radiant in-floor heating, framed out the new tub, ran all new electrical and lighting, hung our first ceiling, installed cement board walls, installed our first tiled floor, completely tiled all four walls in the room, painted the ceiling and trimwork, grouted everything, hung crown moulding, installed all new lighting, installed the shower curtain track, and more. It was insanely busy and a very ambitious project for the two of us to tackle (plumbers handled all the pipes, rough in and fixture installation).
So, without further ado, let’s get on to the photos:


And a quick reminder of how far this bathroom has come:


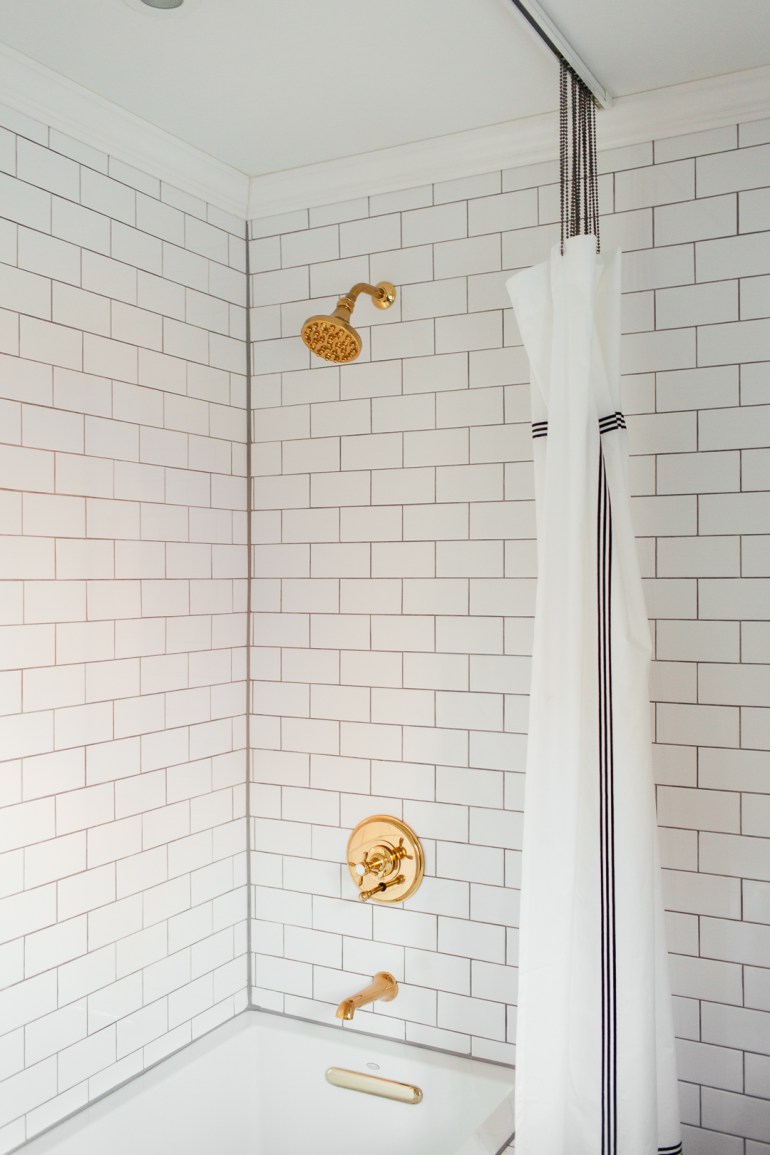
The tile is the star of the room. I knew that I wanted to use classic materials for the tiles, since they’re permanent fixtures that we never intend to change (and hope that buyers feel the same way if we ever choose to sell the house too). Starting with the floors, after a lot of debate, we opted for marble since it’s a nice upgrade and truly makes me happy. We also installed radiant coils, so these floors are nice and toasty (another upgrade). For the walls, I’m a huge fan of going big, so we used the basic subway tile that’s historically relevant to our home and applied to over all the walls. It was no doubt a lot more work but it completely elevates the space.


The tub that previously was in this bathroom was extremely shallow and was really non-functional for baths. After spending a lot of time at the Kohler showroom, we narrowed our choice to the Underscore soaking tub, since it’s great for baths but also comfortable to step into for showers and looks awesome. Since we took down the wall that closed in this shower, I was adamant about using a tub that didn’t require us to put walls back up to keep the space feeling nice and open.
The faucets were finds at the Restoration Hardware outlet that perfectly merge the clean, modern lines I love, with the vintage details like knobs labeled ‘Hot’ and ‘Cold’ that elevate the space and create a more custom feel. The brass hardware helps to bring some warmth into the room, which contrasts nicely with the all white subway tile.


The vanity was a last-minute decision when our first choice became out of stock and also allowed us to be opportunistic when we discovered we’d gained an extra few square feet of floor space. We swapped out the hardware for nice, heavy brass hardware from Rejuvenation that make this vanity look much more expensive and custom. I wasn’t sure how the stock marble countertop would look, since it can be hit or miss with pre-cut marble, but this countertop is actually a pretty gorgeous piece of stone with great movement and veining.


I’m a huge fan of having a lot of light sources in every room, and I make sure that as many of them as possible are on dimmers for instant ambiance. In here we added some extra lights including the pair of pendants flanking the mirror, the recessed light in the shower and relocated the overhead light so it was centered on the doorway. The pendants were super budget-friendly scores we found at Homesense but were in a shiny chrome. A few coats of matte black spray paint later and they totally fit in. The overhead light was a last minute swap (literally at 11P last night), where this CB2 light replaced a vintage find that we had sprayed black, but featured four more globes, which competed for your attention with the pendants. Using a simpler, lower key flushmount allows your focus to land on the pendants.


We added the crown moulding to keep the room cohesive with the rest of our house. It’s a nice traditional element that keeps this room from floating too far into the modern end of the spectrum. We gave all the trimwork a fresh coat of paint, including the windows and door, which went Onyx by Benjamin Moore for an instant dose of chic. We spray painted all the window hardware a matte black to blend in. I’ve been debating this paint treatment on the windows for a while now, and seeing it in this bathroom has cemented that I need to do it on our main floor too. The ceiling and trim are painted in Benjamin Moore Decorators White, as in the other spaces we’ve completed in this house.


The shower curtain track was a DIY inspired by Kristin Jackson at The Hunted Interior, where we didn’t want to rush ourselves into a glassed in tub (which I don’t love for baths and is pretty pricy), until we’d tried out this budget-friendly solution. Apologies that the shower curtain looks a bit droopy – we ran out of ball chain and of course weren’t able to secure more in time. The rug is a vintage find from eBay, as is the lion’s head towel ring (which also matches the one in our main floor bathroom).


All in all we definitely pushed ourselves to create a bathroom that we’re completely smitten with and made sure not to sacrifice the design or any details for the sake of completing this room on time. Taking a step back and looking at how this bathroom works hand in hand with the guest bedroom it accompanies, I couldn’t be happier with the shared elements (crown moulding, ceiling medallion paired with black light fixtures, brass accents and vintage details), but they also both definitely have their own personalities and identities, mainly represented in the use of all-over immersive walls in totally different materials and colours. In short, we’re smitten.
Sources:
Marble Hex Tile | Subway Tile | Grout | Bathtub | Vanity | Vanity Pulls | Mirror | Toilet | Faucet | Shower Head | Tub Spout and Control | Shower Curtain Track | Hand Towel | Flushmount Light | Ceiling Medallion
And don’t forget to check out all the other awesome reveals by other One Room Challenge participants here.

One Room Challenge: Guest Bathroom, Week Six
Week Six of the One Room Challenge™ has been all about tiling the walls. (You can check out past week updates here: week one, week two, week three, week four, week five). Because I’m an overachiever, or maybe just really confident in our skills to figure out how to accomplish the look I’m going for, I ambitiously opted to tile our entire bathroom. That includes the tub surround and all four walls. And did I mention we’d never tiled before?
Excuse the mess in all these photos – this isn’t glamorous work.


The all-over tile really helps to elevate the subway tile. And, I’m very particular about my tile transitions and wasn’t entirely certain of a way to end the tile around our tub, given it’s location in the room in a way that felt elegant.
We have been tiling non-stop since Friday night and since taking these photos knocked out most of the final wall. Serious props to my husband, Cory, who kept us going on tiling, despite me nearly throwing in the towel more than a few times.
In the original room, the window trim butted right up against the wall, which would make tiling around it really awkward. We ended up sourcing new trim that was 2 1/4” wide instead of 2 1/2” wide that allows for just enough space to slide the tiles behind the window trim for a much cleaner and more intentional look. They don’t, however, make rosettes that are 2 1/4” square, so we ended up using the table saw to slice 1/8” off each side of the rosettes to line everything up nicely. This whole issue gave me some anxiety, but I’m so happy with how we managed to make it work.
For the tile, these are some of the things we’ve learned:
- Subway tile comes with built in spacers (called lugged tiles), but I really wanted the grout lines to be more visible, so we used 1/16th inch spacers on the built in spacers, achieving essentially a 1/8th inch grout line.
- Start with a super level first row, otherwise you’re going to be fighting to keep your lines straight up the wall. We nailed straight ledges into the wall using whatever we had around (leftover drywall edges, old door trim, etc.) to support our first row. We also started with our second row and are going back to add the real first row after all the tile work is done.
- We have an old house and our walls aren’t perfectly straight and that’s a bit visible in the corners. Given that, to start each new row of tile, we marked the center of a new tile with a China pencil and placed that dead even between two tiles below it and then worked out from the middle of the wall to the edges. This means our edge tiles aren’t all consistently sized from row to row, but our grout lines are running straight.
- Don’t assume that if you use your spacers that all your corner tiles are going to match up. We did and were surprised when we got to the shower head wall and started tiling from the bottom up, staying in line with the tiles on the front of the tub when the row above the apron of the tub just didn’t line up with the tiles running across the tub. Hard to explain, but constantly be measuring that all your corners and edges are indeed lining up.
- If you don’t want to chip your tiles on the tile saw, make an initial 1” cut on one side of the tile, then flip it over and make the full cut through the tile. We learned this fast when we were chipping tiles left and right.
- We used both thinset and tile adhesive in this room. Make sure you’re using the right adhesive for the right surface. Thinset is messy and since we were mixing it ourselves (instead of buying premixed) you had some wait time to let it set, etc. On the drywall we used tile adhesive, which comes premixed and goes a long way. We found the tile adhesive to be a lot easier and tidier to work with. Just make sure you wipe down the tiles fast, because it’s hard to remove the adhesive off the tile edges and face.
All in all, while this was an insanely huge task, I’m so happy we stayed on the path to tile all the walls. Given how inexpensive subway tile is, the cost to do all the walls is still very low (I think we spent ~$350 on subway tile) but the impact is huge. I know it’s a tile that’s everywhere, but given it’s historical roots, I do believe it will stand the test of time. Especially applied in a way that is so immersive and detail oriented, it really takes the room to the next level.
What’s really going to finish off these walls is the grout (we’re going with a medium grey) and crown moulding. I know crown moulding is an unusual choice in the bathroom, but I believe it’s going to pull together all the rooms we’ve completed in the house as a cohesive story. Plus it really blends the traditional with the modern in this room.
In addition to tiling, we also painted the door, replaced the door trim, replaced the window trim and painted the crown moulding.
Lest we forget that we have to reveal this room NEXT WEEK. Which means we have a ton to accomplish before then:
- Build the niches (which requires a last minute trip to Floor & Decor in NJ, ugh.)
- Run the final row of tile along the bottom edge (we’re about halfway done)
- Grout all the walls
- Caulk all the edges
- Install the crown moulding
- Seal the grout
- Install the light fixtures and fan
- Hang the mirror
- Install the shower curtain track
- Install the vanity and hardware
- Plumbers are coming Monday to install all the fixtures
- Style the space
Well, this is going to be a sprint to the finish line!
Don’t forget to check out all the other participants here.